
this was our first year not getting professional pictures done.
to save a buck (and because i like a challenge), i attempted to be our own photographer. i googled “how to use my timer on my rebel Canon” and went for it.
surprisingly, it wasn’t that hard. of course, they aren’t professional, but they’re good enough.
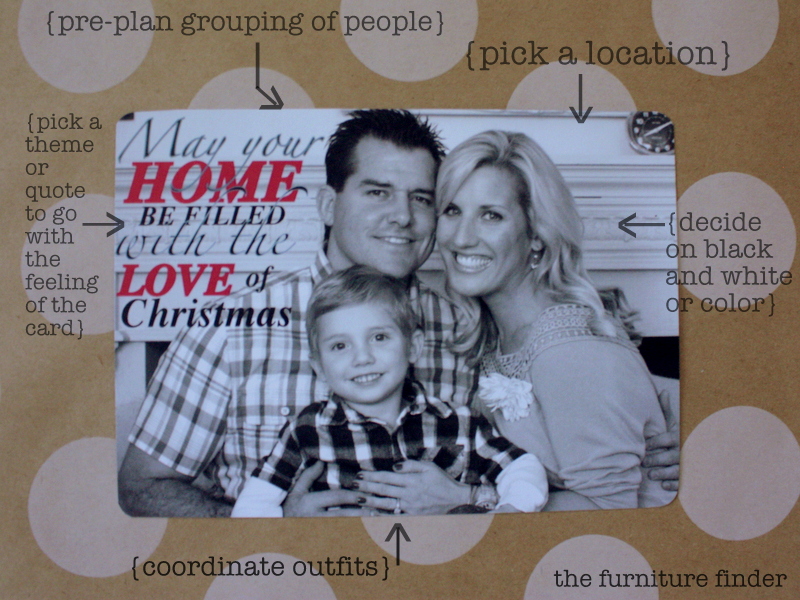
first, i did a little research on Pinterest to check out family pictures and layouts of the people.
then, i picked a location (in this case it was at my grandmother’s house because she has a lot of fun props).
after that, i had my family choose clothing in a combination of blues and greens with different textures (plaid, striped, floral).
one Sunday afternoon, we all met up at my Grandmother’s place and my dad got the car in position, while i got everyone else in position and then set up my camera on a ladder, set the timer, ran and smiled.
okay, it wasn’t that easy, but almost.
two hours later, we were done. i went home to see what we came up with.
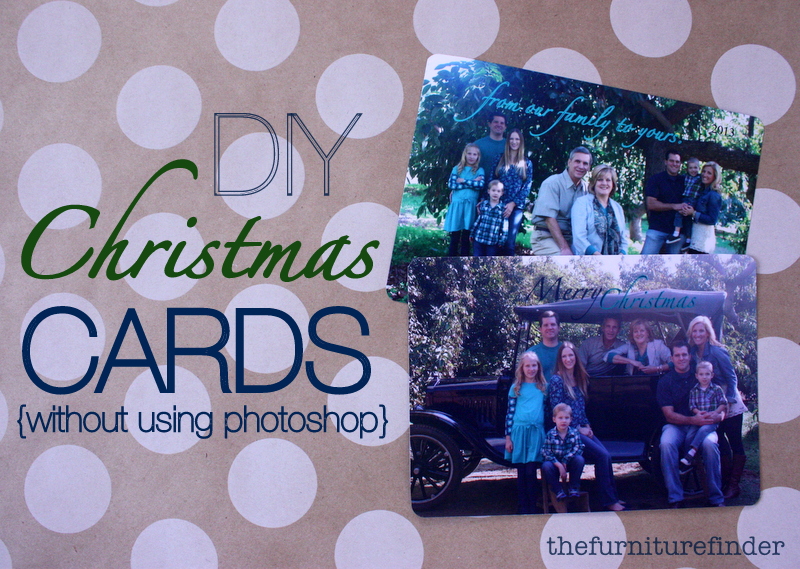
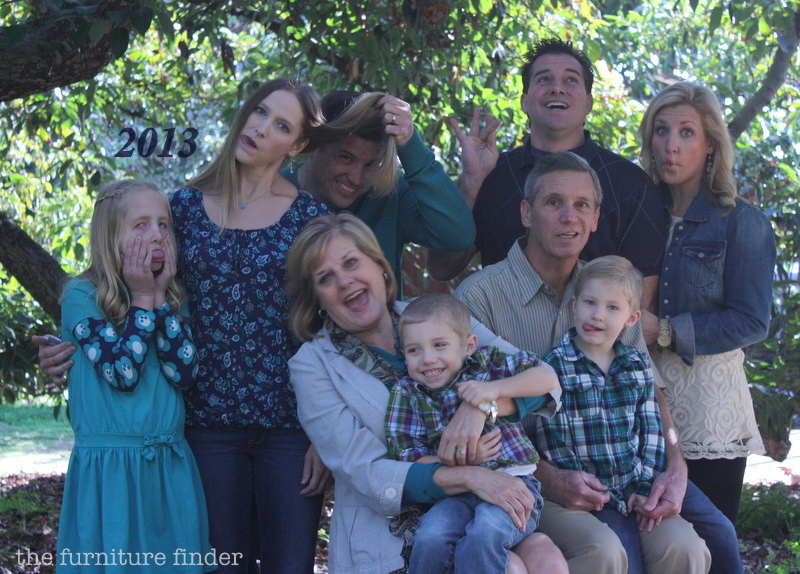
this is what they looked like:

and here’s the one in my grandmother’s avocado grove:
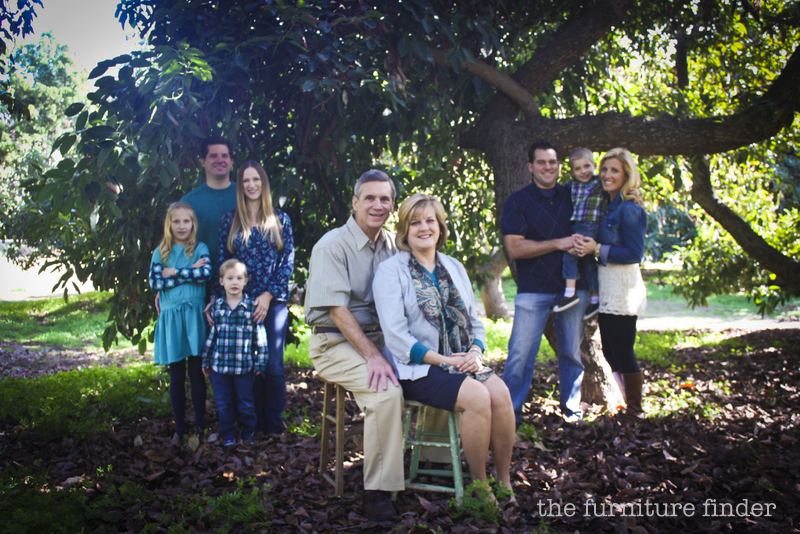
besides being a little blurry and a little washed out, we were happy.
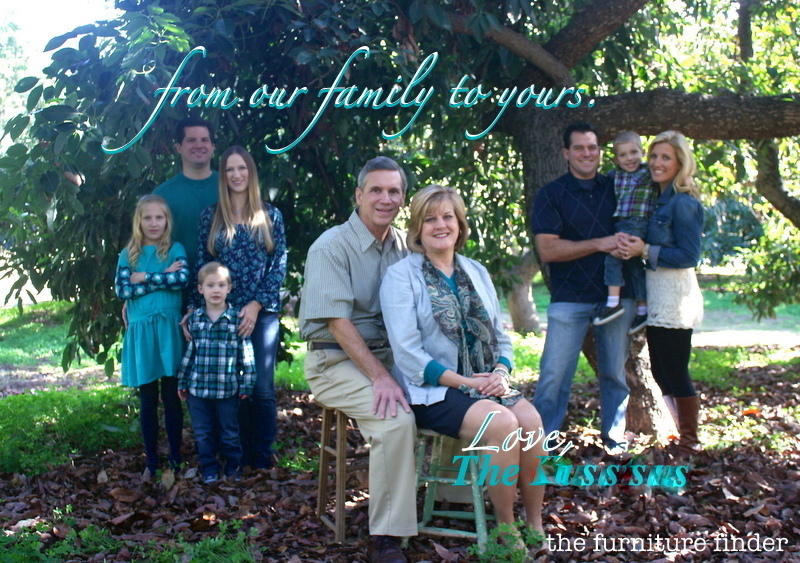
the next step was to add some words. since my computer (a MacBook Air, the smallest version) does not have enough memory (or gigabits or whatever…that’s my brother, the computer guy’s, arena), i like to use a program called Picasa. it’s completely free and allows you to completely edit photos and add text and overlays (B&W, antique, sepia, etc) to any photo. you can’t switch out heads (that sounds so morbid, sorry) or cut pieces of the picture out like Photoshop; it’s not that advanced. i have loved it, regardless, and it’s super easy to work with.
here’s what the pictures looked like after adding words:
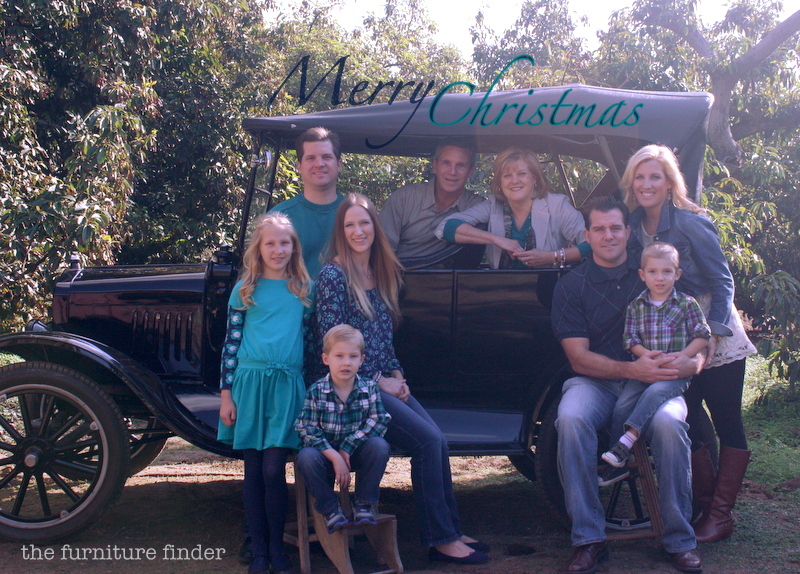
and the back:
the last step was to make them into cards.
i uploaded the photos into an online company called Mpix that i’ve been using for the last few years for our cards and any prints i need. they are an online professional photography lab and each card and print is looked over and double checked by an actual individual. plus, the cards are printed on the highest quality of paper. you can choose different textures such as linen, pearl (a beautiful metallic finish) or 100% recycled paper AND it’s all included in the price of the card. we went with the postcard style card (envelopes are included) and opted to pay a small fee to have the corners rounded. i highly recommend this company. i’ve done some price comparisons and they are more affordable than some of the other top leading card companies (tiny prints, minted, etc).
so, there you have it. the basics on how to diy on your Christmas cards.
pretty easy, huh?
as long as everyone cooperates. 😉
xo

really neat Kelly. I’m going to try it next year. Arlene